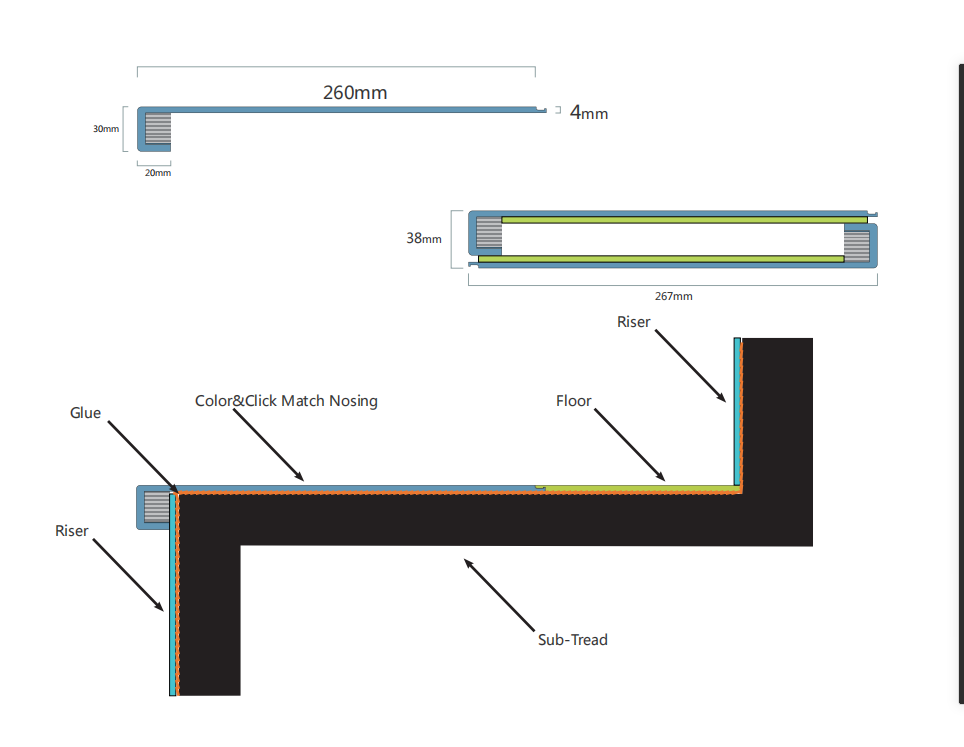
How to install the stair nosing?
 Apr 25, 2022|
 View:604
Installation:
1. Measure and cut the flush stair tread to proper length;
2. Dry lay the nosing on the stair and measure the distance from the edge of the stair nosing to the vertical surface or riser and cut flooring to fill that space;
3. Put the riser in place to fit and applying glue on the back to install;
4. Connect the cut flooring to the stair nosing and dry-fit before applying serpentine bead of the glue in place. (first glue the cutting floor then the nosing);
5. For stair with open two-ends, you can use the self-adhesive edge banding to make a perfect finish.
Note:
1. Begin at the bottom step;
2. The riser could be on top of or behind connecting floor determined by professional installer and may be dictated by jobsite conditions but riser behind floor may have more aesthetic advantage;
3. Each step may look similar but actually different in size so the cutting process may be customized for each step;
4. Do not to click nosing with other types of click flooring though they may seem fit;
5. Allow 24 hours' of curing time after installation.


